Affiliate links on Tech Countless may earn us a commission. Learn more
ShareX Not Recording Screen? 4 Ways to Fix it
If you use ShareX to record PC screen but it is not recording or you are facing some errors, then in this article we’ll show you 4 ways to fix it.
1. Install Recorder Devices
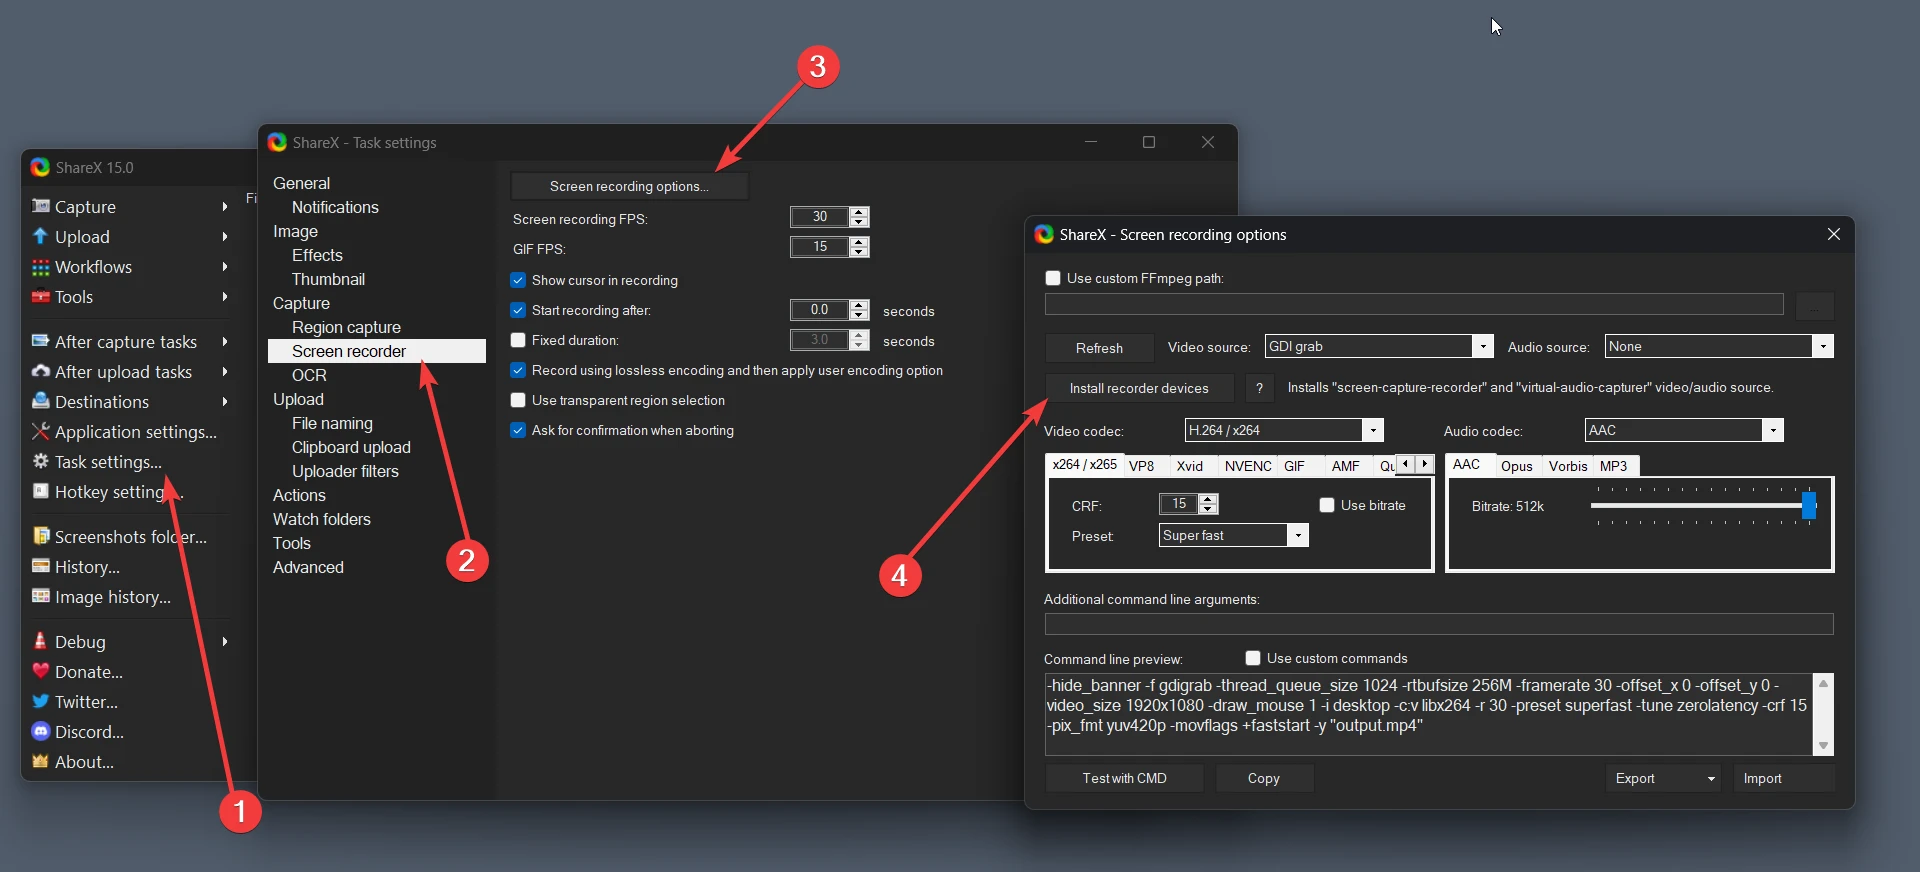
Step 1. Open ShareX and select Task settings.
Step 2. Now, choose the Screen recorder and select Screen recording options.
Step 3. Just click on the Install recorder devices and install it as per convenience then restart ShareX.
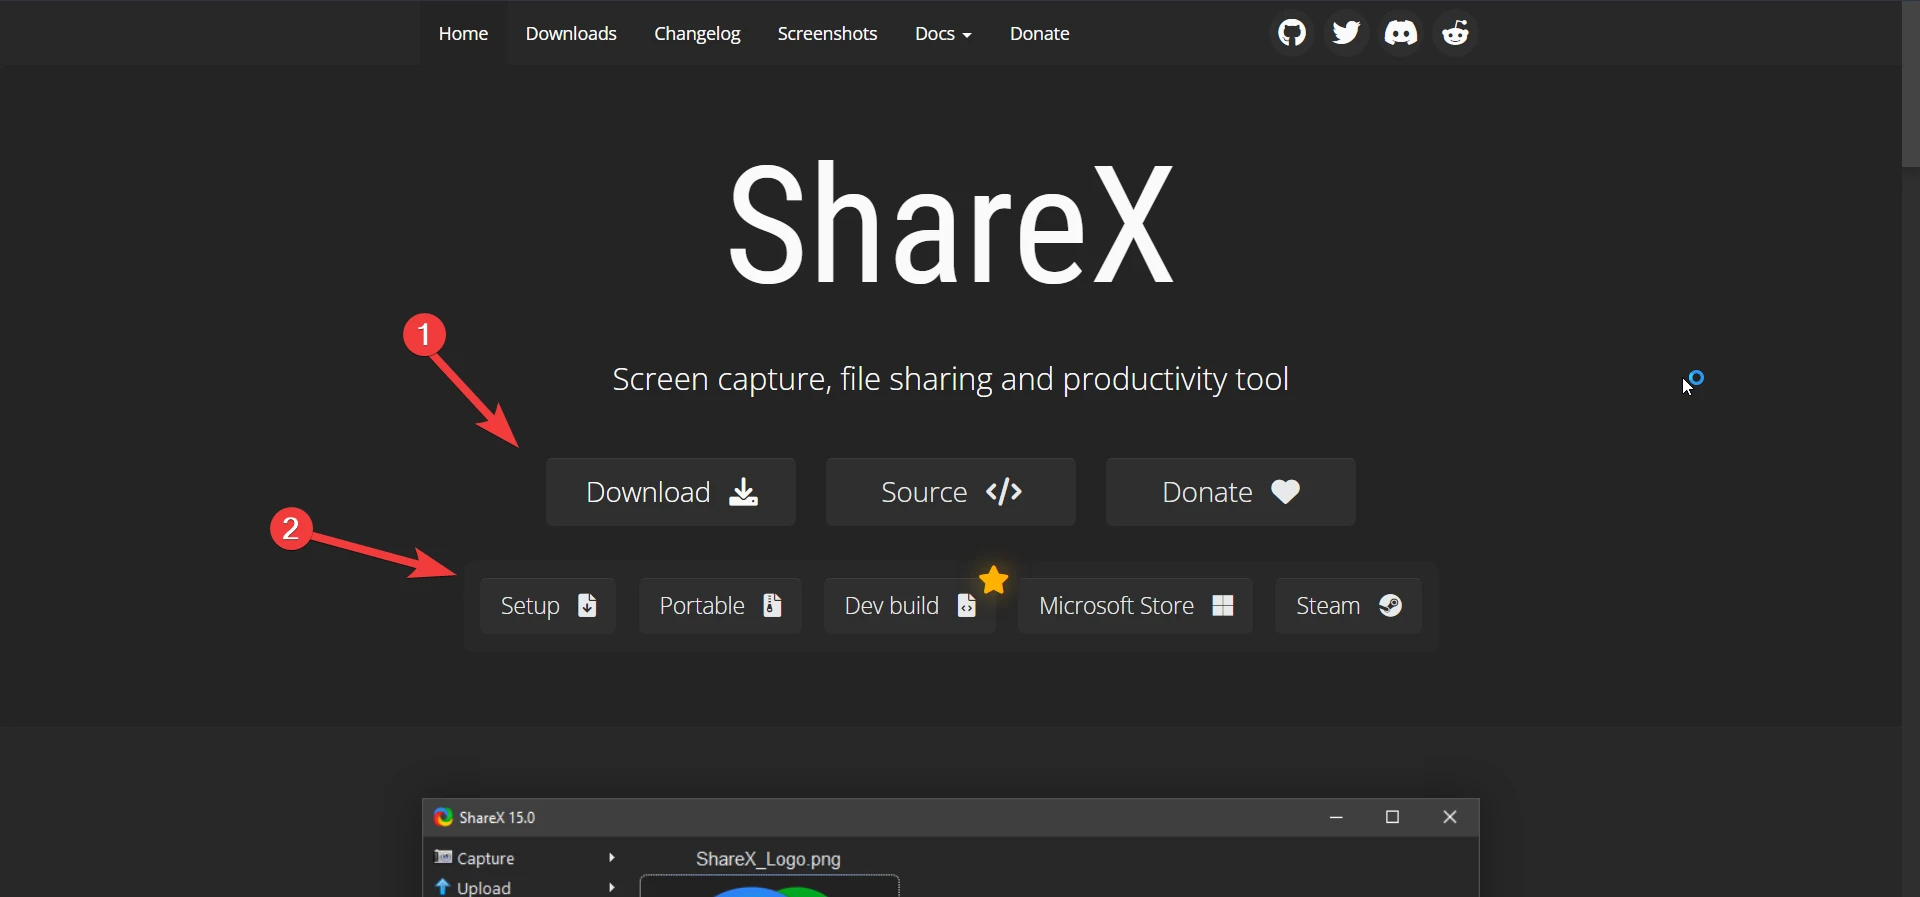
If you didn’t find any Install recorder devices options, it may be possible that you installed ShareX from the Microsoft Store. Go to the official website of ShareX, then click on download and choose Setup and install it. After that, you can find the “Install recorder devices option, install it, and restart your PC.
If you are still facing the errors then, move on to the next method.
2. Set Accurate Video Source
There are times when the video source is not set to the right option and as a result, it cause errors when the user tries to record the screen using ShareX. This is how you need to set the accurate video source:
Step 1. Again, open ShareX and go to Screen recording options like we did in the first method.
Step 2. Select or change the video source to either GDI grab or Integrated Camera or Screen capturer recorder. (Make sure that the video source is not set to None)
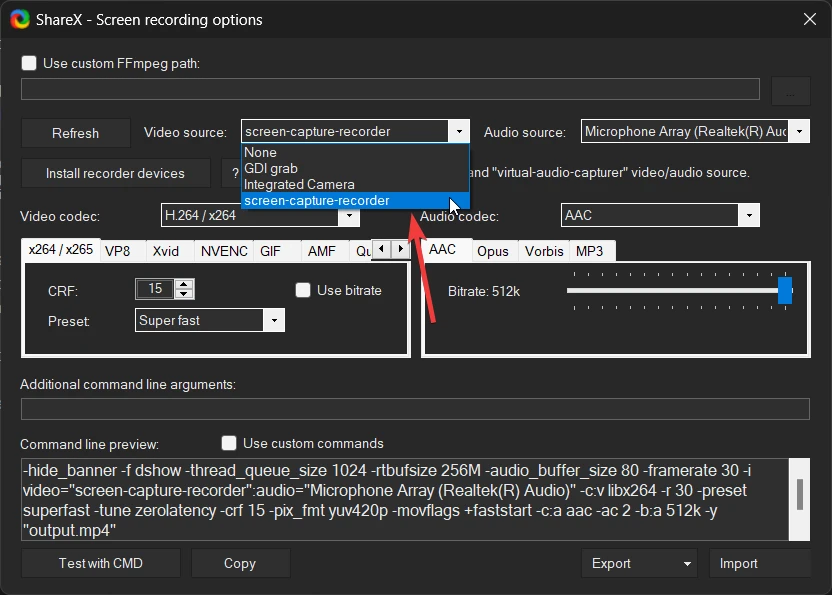
- GDI grab: Captures the screen using FFmpeg methods.
- Integrated Camera: It allows you to record using the webcam.
- Screen capture recorder (Most Recommended): The open source DirectShow filter is used here to record screen.
Hence, this is how you can change the video source, the Screen capture recorder options is the most suitable video source and tends to not cause any error.
3. Change Video Codec
If you did not set the correct video codec, then you will face a screen not recording issue in ShareX. To fix it:
Step 1. Once again, go to Screen recording options in ShareX.
Step 2. Expand the Video Codec section and change it to H.264 / x264.
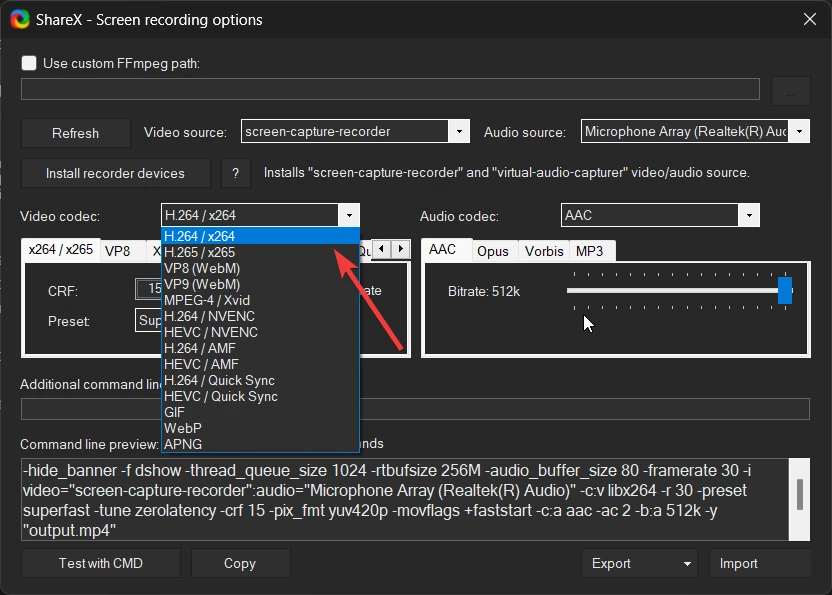
You can also set it to H.265 / x265 but, as of now H.264 / x264 is probably the best video codec available for users.
4. Update Drivers
Drivers are probably one of the most ignored parts of the system. Having an outdated driver is quite common, and updating those might solve errors or fix some issues.
You can use Driver Booster to update most drivers with a few clicks. Here’s how you can do it:
Step 1. Download and install Driver Booster.
Step 2. Then just Scan for the outdated drivers.
Step 3. Now it provides a list of outdated drivers; simply update them one by one. Also, check for Windows updates.
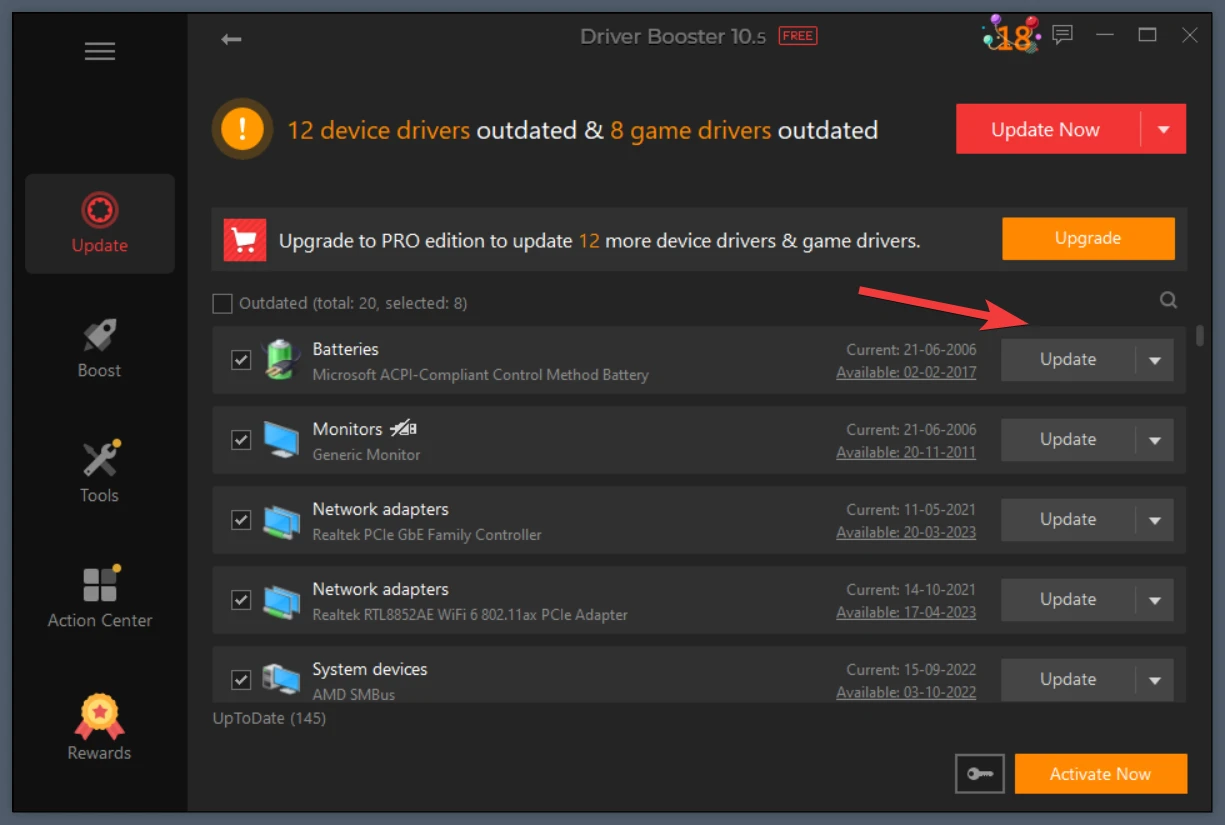
Now, just restart the system and you should be done.
Tip For Better Recording With ShareX on Low End System
Open Task settings, then Screen recorder, and enable Record using lossless encoding then apply user encoding option.
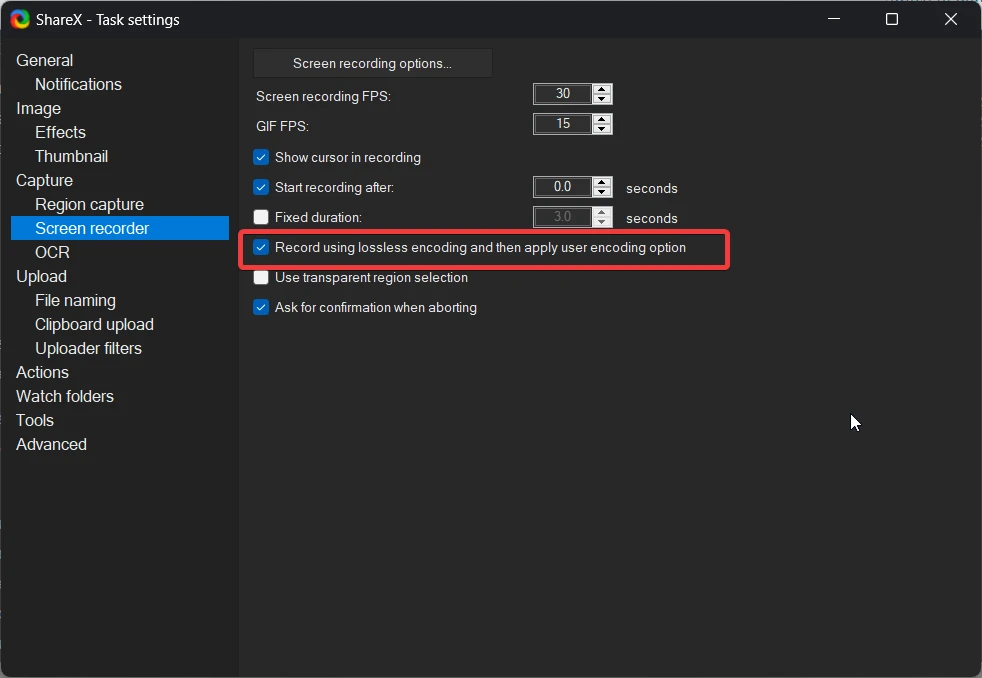
What it does is that during recording, it will do lossless encoding, which saves your resources during recording, and once you finish recording, it will take a few minutes to do encoding. This way, you get better performance while recording using ShareX on low end system.
FAQs
Can you edit videos in ShareX?
No, there are no such editing tools in ShareX.
Which hotkey is used to record a video in ShareX?
As a default hotkey, it is set to Shift+PrtSc. However, you can change it to whatever combination in ShareX, from the hotkeys settings.

