Affiliate links on Tech Countless may earn us a commission. Learn more
Easy Guide to Change DNS In Google Chrome
What is DNS?
DNS stands for Domain Name System. We generally remember websites like facebook.com, YouTube.com, etc., so when we type any site URL into the address bar, DNS translates the domain name into the IP address of a web server. So the browser can establish a connection with the server and load that website on the user’s browser screen.
Just for understanding, consider DNS as a phonebook of the internet, and all domain names are contacts, and numbers are IP addresses.
The Problems With Default DNS
Before we begin, you must know why changing the default DNS can be a good option for you. The default DNS from your ISP may have a lot of limitations. Some of them are:
- Outdated DNS will take a longer time to search for the right IP address.
- There might be a delay in loading a page.
- Time-out errors and host issues are common.
Easy Guide to Change DNS In Chrome
The processes for Changing DNS on smartphones and PCs are different. We’ll be checking out both of them.
On Desktop PC
- Open your Chrome browser.
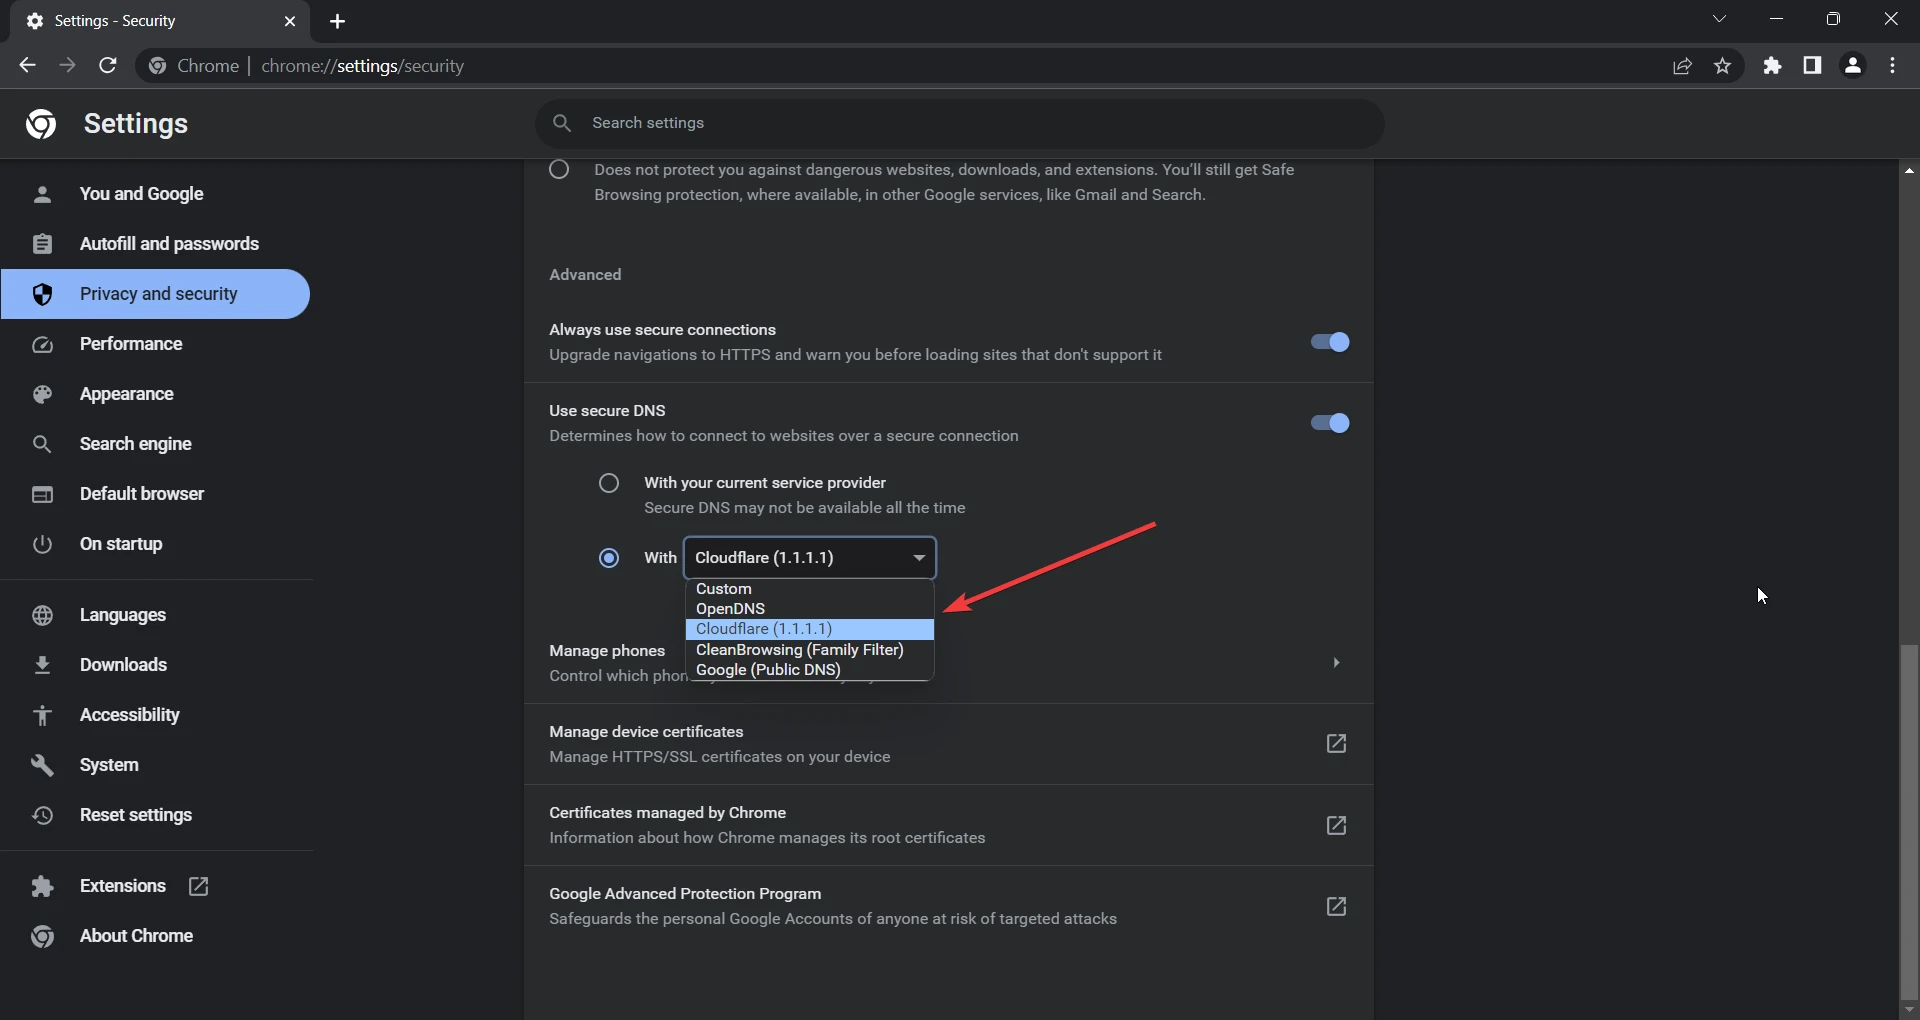
- Paste this in the URL Bar: chrome://settings/security
- Scroll down till you find the Advanced section.
- Below it, you will find Use Secure DNS enable it.
- By default, it will be on With your current service provider.
- Click on the “With” option below it.
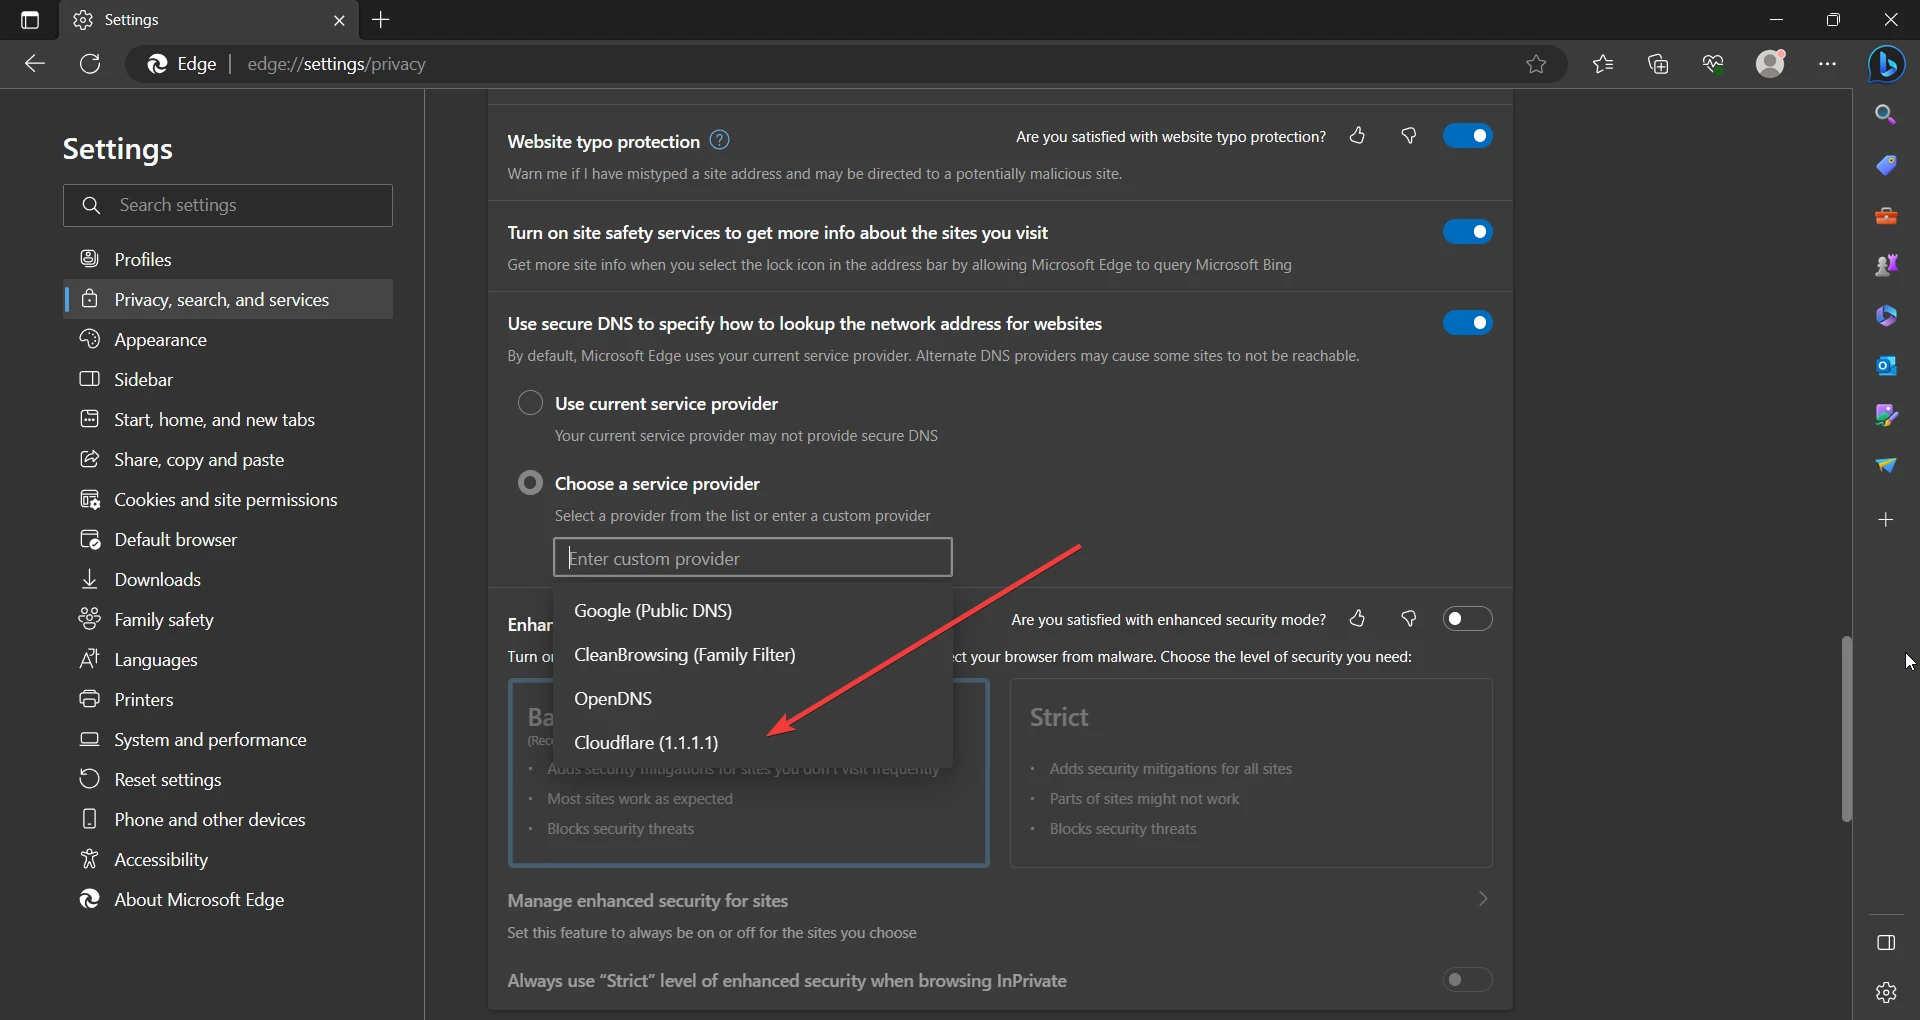
- In the drop-down menu, you can choose the available list of DNS we recommend to select Cloudflare (1.1.1.1).
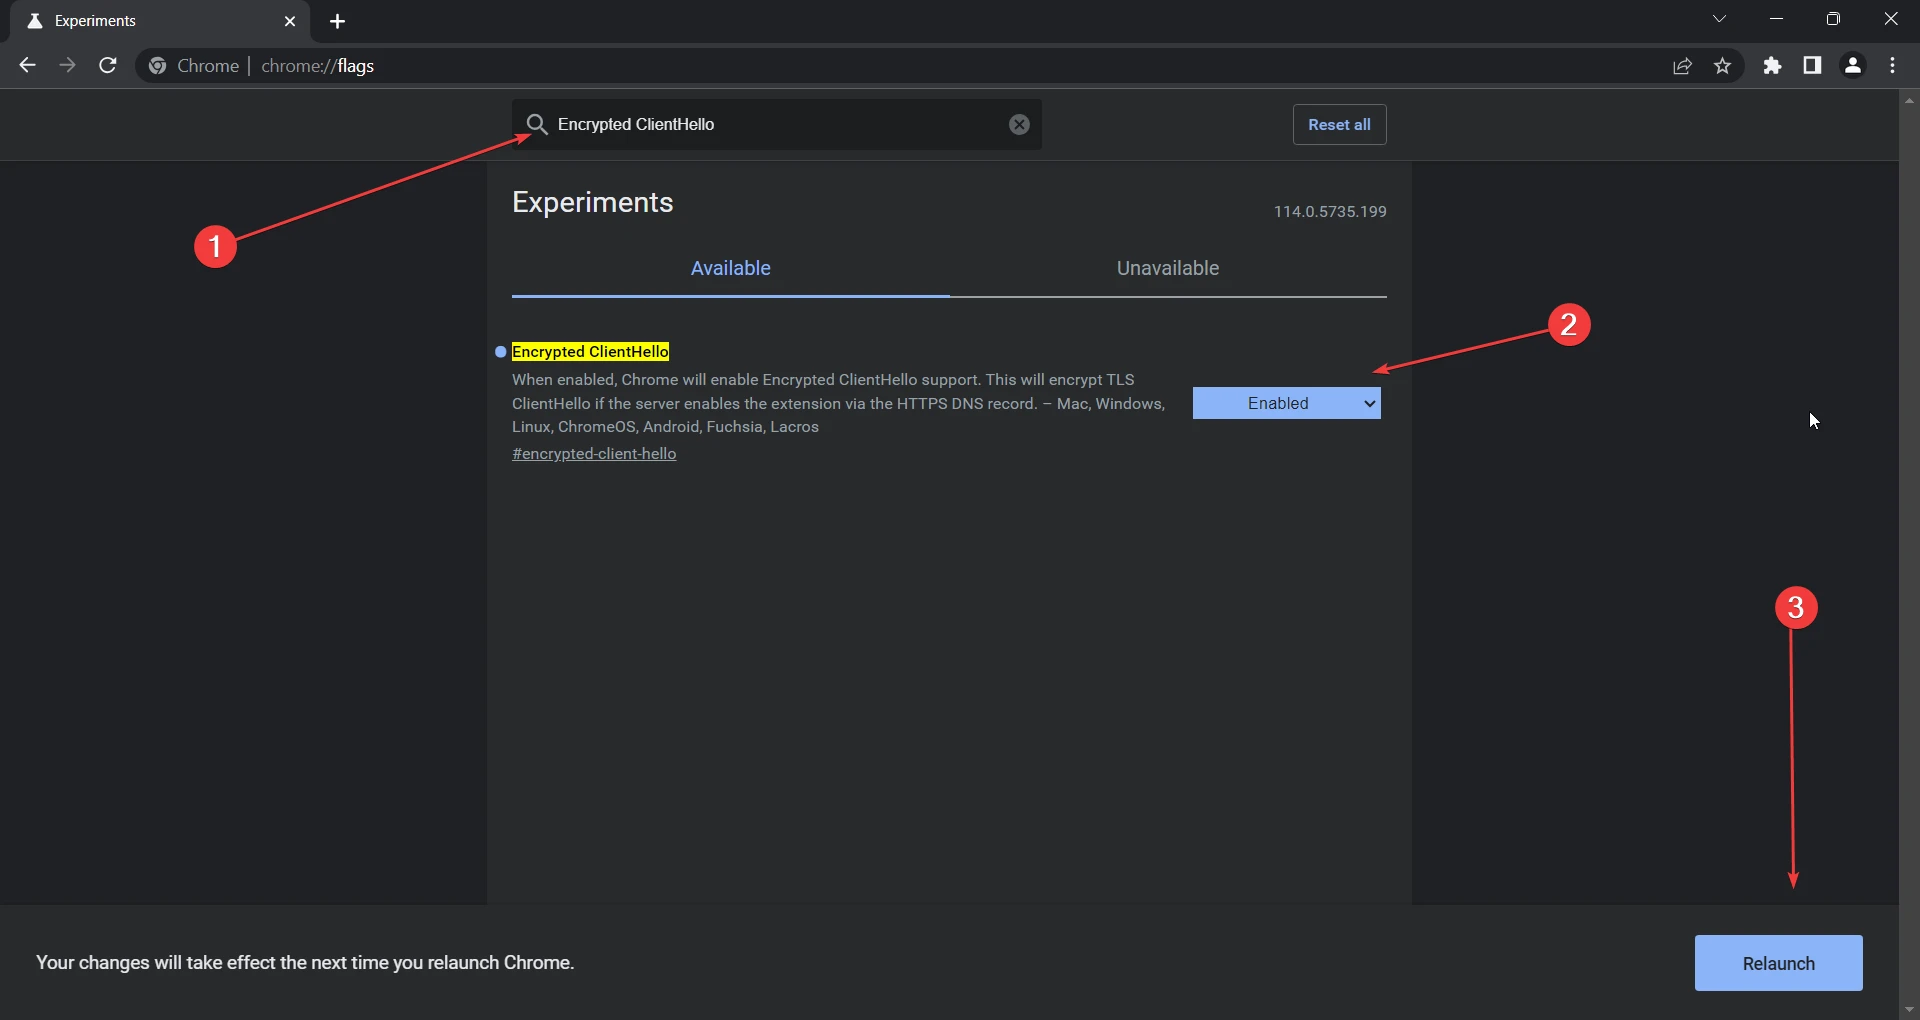
Additionally, we will suggest that you enable the Encrypted ClientHello from Chrome Flags. What it does is encrypt the name of the website that you are visiting during the TLS handshake, which is good for privacy too.
Type chrome://flags in the URL bar and find Encrypted ClientHello, then enable it and relaunch Chrome.
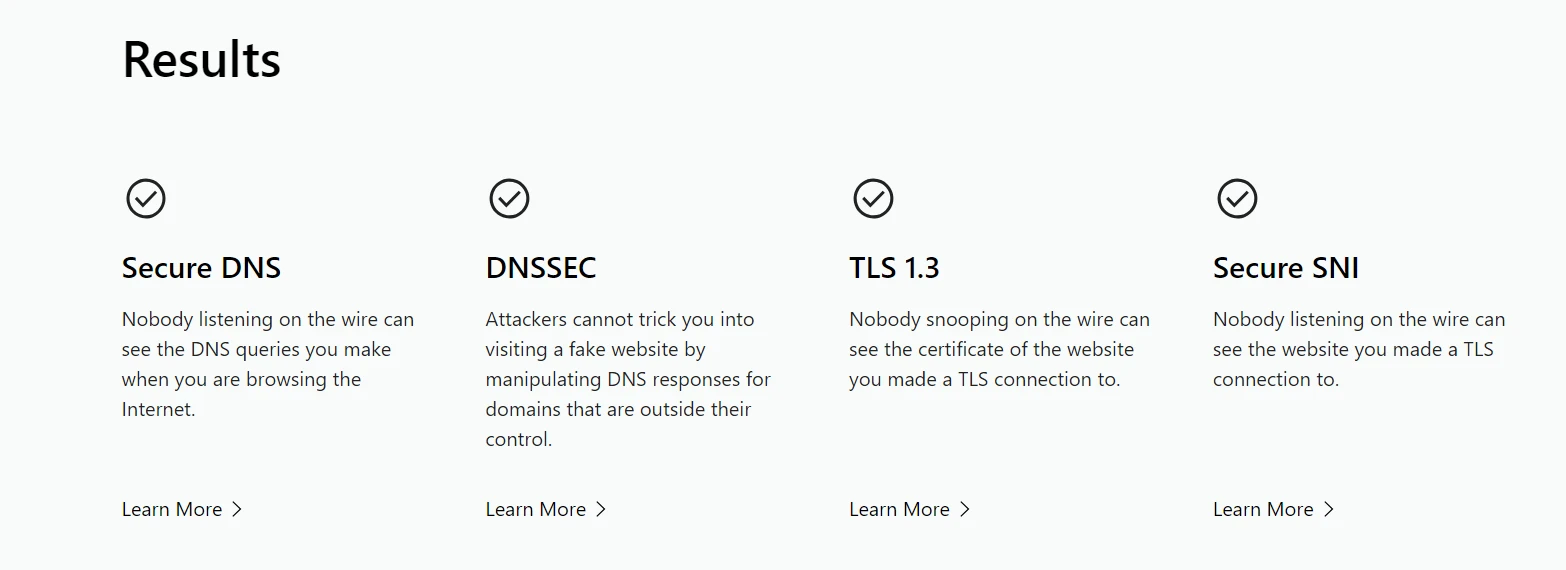
Then go to Cloudflare Browser Check and wait a few seconds until the “Check My Browser option loads up, then click on it. It should have a tick mark for secure DNS, as you can see below: If not, restart your browser and select Cloudflare again.
On Smartphone
- Open your Chrome browser.
- Go to Settings > Privacy and security.
- Scroll down till you find Use Secure DNS enable it.
- By default, it will be on Use your current service provider
- Click on the Choose another provider option below it.
- Choose Cloudflare here as well then visit Cloudflare Browser Check to test it.

You can also use a similar method to change DNS in other Chrome-based browsers.
Changing DNS in Brave & Edge Browsers
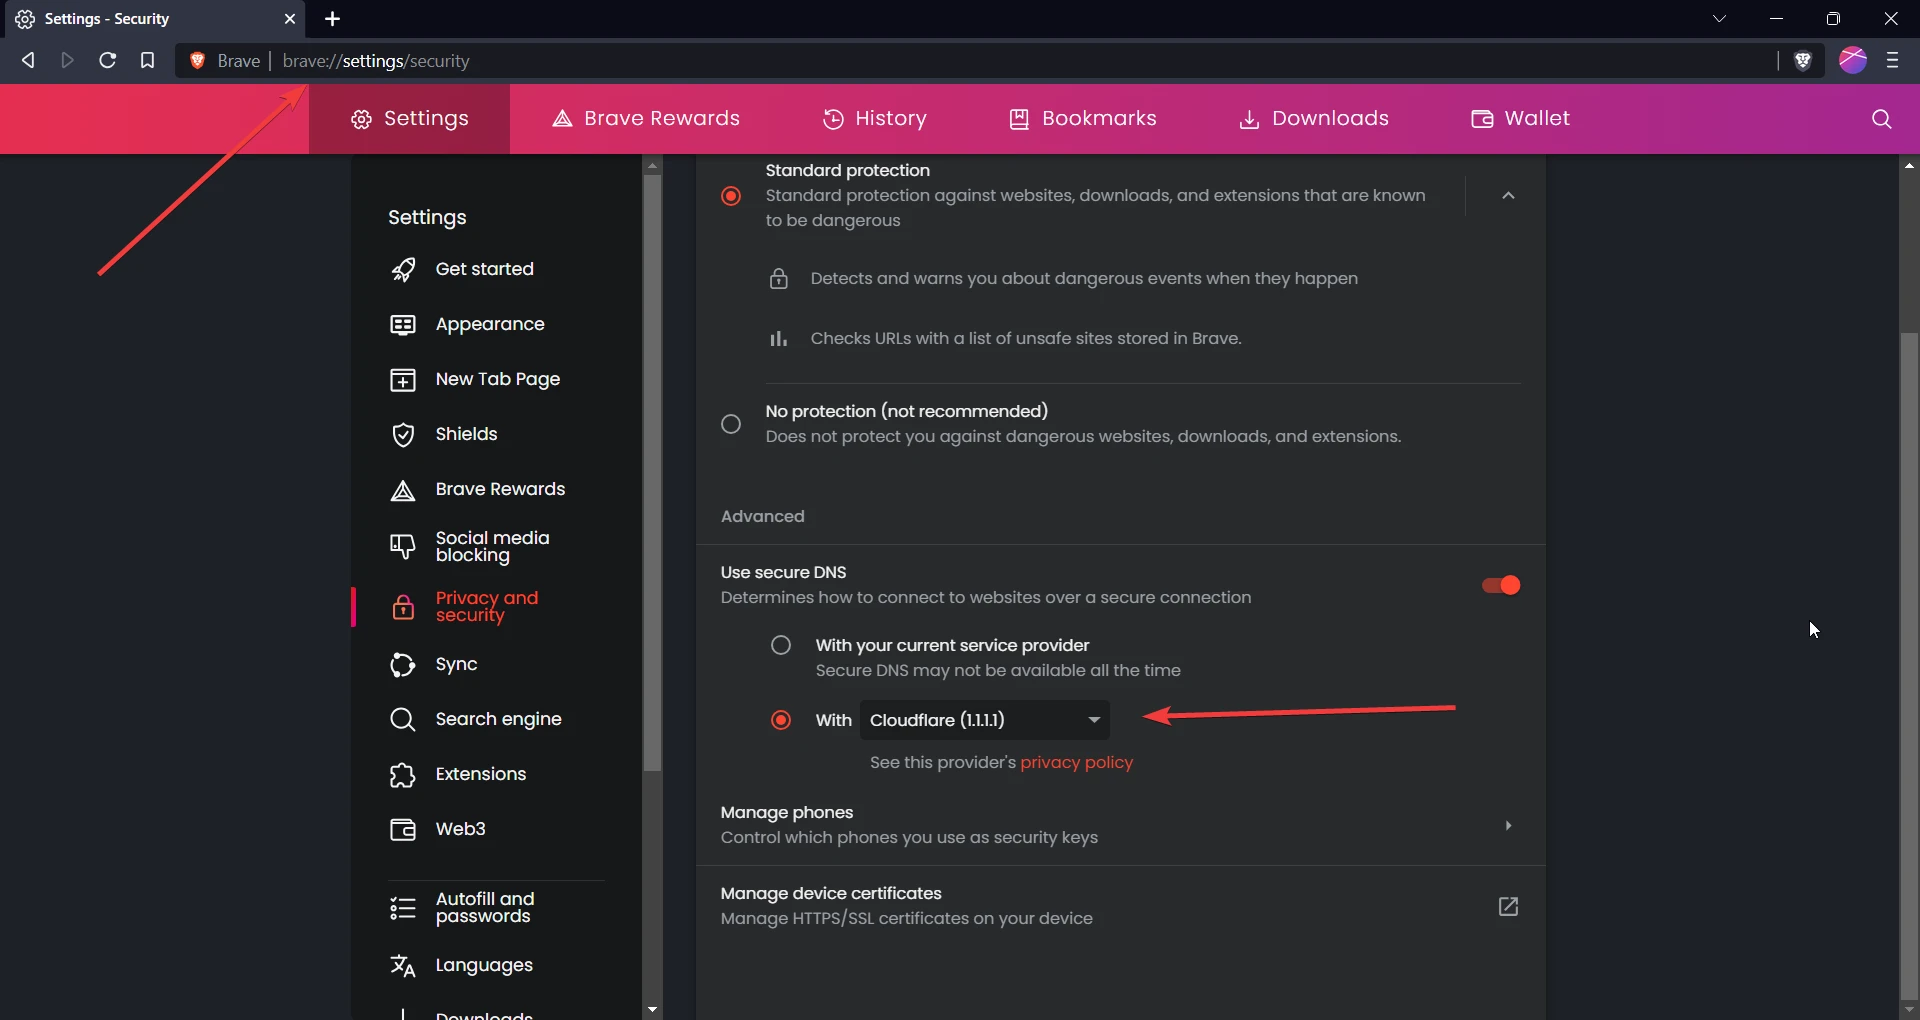
For Brave Browser: Paste this in URL Bar: brave://settings/security then scroll down and enable Secure DNS and select Cloudflare.
Important: You can easily enable Encrypted ClientHello, which we did earlier in Chrome. This can also be done in the Brave browser and the Chrome mobile app by going to chrome://flags.
For Microsoft Edge: Paste this in the URL bar: edge://settings/privacy, then scroll down and find Use the secure DNS option and follow the same steps as above.